Category: Uncategorized

  • Safety with Hand Tools: Habits and Setups That Prevent Injuries

    Safety with Hand Tools: Habits and Setups That Prevent Injuries

    Why Hand Tool Safety Deserves Real Attention

    Power tools get most of the safety headlines, but hand tools quietly cause a large share of workshop injuries. Slipping screwdrivers, dull chisels, cracked hammer handles, and poorly supported workpieces can all turn a simple task into a trip to urgent care. The good news is that most of these incidents are preventable with a thoughtful setup and a few consistent habits.

    This article focuses specifically on safety with hand tools—not which tools to buy, not how to sharpen or maintain them, but how to use and manage them in ways that protect your hands, eyes, and joints over the long term.

    Building a Safer Workspace Before You Pick Up a Tool

    Hand tool safety starts before the first swing of a hammer. The layout and condition of your workspace directly affect how safely you can use even the simplest tools.

    First, ensure clear footing. Stray offcuts, loose hardware, and spilled liquids create tripping or slipping hazards, especially when you’re carrying heavy tools. Get in the habit of quickly sweeping or vacuuming chips and debris at the start of each session, not just the end.

    Next, think about lighting. Poor lighting leads to mis-aimed strikes, misread measurements, and accidental contact with sharp edges. Supplement overhead lighting with a movable task light that you can aim exactly where you’re working, especially for detailed tasks like cutting joints or working inside cabinets.

    Finally, consider height and support. A too-low bench forces a hunched posture and makes controlled, straight tool movements difficult. If you don’t have a full bench, improvise with stable sawhorses and a sturdy board, raising the work to a comfortable, chest-level height whenever possible.

    Personal Protective Equipment That Actually Gets Used

    Protective gear only works if you reach for it every time you should. Choosing comfortable, convenient options greatly increases the odds you’ll use them.

    Eye protection is non-negotiable whenever you’re chiseling, hammering metal, cutting, or working with springs and clips. Keep inexpensive, clear safety glasses in multiple spots—on the bench, near your toolbox, and in a portable kit—so you’re never far from a pair.

    Hand protection is more nuanced. Thin, well-fitted work gloves offer good protection against nicks, splinters, and abrasion during general handling, but they can reduce dexterity for fine work. Use gloves for handling rough materials, then switch to bare hands when precise control is critical—provided the tool’s design and the task don’t create a risk of cuts or pinches.

    Hearing protection is often overlooked with hand tools, but repeated hammering on metal, chiseling masonry, or striking hardened surfaces can be surprisingly loud in enclosed spaces. Simple foam earplugs or low-profile earmuffs can significantly reduce fatigue.

    Safe Practices with Striking Tools

    Hammers, mallets, and striking tools seem straightforward, yet they cause a disproportionate number of injuries—usually to fingers, eyes, and wrists.

    Before using a hammer, check the handle and head. A loose head, visible cracks, or splintering handle are all red flags. Never keep “just one more job” in mind with a compromised tool; a head that flies off mid-swing can do real damage.

    Always strike appropriate targets with the correct hammer. Use a soft-faced or dead-blow mallet for delicate surfaces, and avoid striking hardened steel with a hardened steel hammer unless the tools are specifically designed for that purpose. Hardened surfaces can chip, sending sharp fragments flying.

    Support the workpiece as close to the point of impact as possible. When driving nails into thin stock or delicate materials, use a backing board to prevent flexing. Flexing materials cause hammer blows to bounce unpredictably and increase the chance of glancing strikes.

    Cutting Tools: Respecting Edges and Grain

    Knives, chisels, handsaws, and other cutting tools demand special respect. Most serious hand tool injuries involve a very sharp edge meeting an unprotected finger due to loss of control.

    Whenever possible, cut away from your body—and not just in theory. Visualize the full path of the tool if it suddenly slips: where will it go? If the answer is “toward my hand” or “into my thigh,” reposition your work, change your stance, or alter the direction of the cut.

    Always secure the workpiece. A board held by one hand while the other wields a knife or chisel leaves your non-dominant hand directly in the hazard zone. Use clamps, a bench vise, or even a temporary stop screwed to scrap wood to hold the piece steady so both hands can stay on the tool or handle.

    Work in thin passes rather than forcing deep cuts. Heavy pressure encourages sudden slips when the tool finally breaks through resistance. Thin slices not only yield a smoother surface but also give you more time to react if the tool starts to wander.

    Mechanic using hand tools in a workshop

    Wrenches, Pliers, and Screwdrivers: Avoiding Common Traps

    Mechanical hand tools may seem low-risk, yet rounded fasteners, slipping jaws, and over-torqued screws cause plenty of minor but painful accidents.

    With wrenches, choose the correct size and type before applying force. An adjustable wrench that isn’t snug on the fastener is prone to slipping, sending your knuckles into nearby metal. Position your hand so you’re pulling the wrench toward you when possible; this gives better control and reduces the chance of overbalancing if it suddenly comes free.

    Pliers should grip workpieces close to the pivot for maximum control and leverage. Gripping near the tips invites twisting and sudden release. Don’t use pliers as a substitute for a wrench on nuts and bolts unless absolutely necessary; they’re more likely to slip and damage both the fastener and your hand.

    For screwdrivers, always keep the tool aligned with the screw axis and maintain firm downward pressure. A cam-out (when the bit slips out of the screw head) can drive the tool into your supporting hand or the work surface. If you encounter a stubborn screw, switch strategies—penetrating oil, a better-fitting bit, or a manual impact driver—rather than simply applying more force.

    Supporting Workpieces Safely

    Many hand tool injuries don’t actually stem from the tool itself but from unstable or poorly supported workpieces. Good support keeps tools from binding, slipping, or kicking back.

    Use clamps liberally. Two quick clamps used well are safer than a dozen fancy tools on a bench. Position clamps so they oppose the direction of force: if you’re pushing a plane forward, the clamp should prevent the board from sliding in that same direction. If you’re chiseling downward, the clamp should prevent the piece from lifting or pivoting.

    When cutting or sawing, ensure offcuts are supported so they don’t pinch the blade or tear away at the end of the cut. A pinched saw blade can suddenly jump or flex, risking loss of control. Simple supports like scrap blocks, sawhorses, or a second person holding the far end of a board can prevent surprises.

    Safe Storage and Handling of Hand Tools

    Safety continues when tools are not in use. Poor storage can turn a tidy shop into a field of hidden hazards.

    Store sharp tools with edges protected and oriented away from common reach paths. Chisels and knives should never lie loose in a drawer where fingers fumble blindly. Use edge guards, simple wooden blocks with slots, or dedicated racks so you can see and avoid the sharp parts easily.

    Heavier tools belong low, not high. A hammer or large wrench falling from an overhead shelf can cause serious injury. Place the heaviest items on lower shelves, in bottom drawers, or on sturdy racks mounted at chest height.

    When transporting hand tools, use a toolbox, tote, or roll that prevents them from banging against each other. Not only does this protect edges and handles, but it also reduces the chance of reaching into a bag and grabbing an exposed blade.

    Developing a Safety-First Mindset

    Specific tips and techniques are important, but they’re most effective when backed by a mindset that treats safety as part of the craft, not an obstacle to it.

    Before starting any task, pause for a short “safety preview”: What could slip, pinch, or snap? Where are your hands relative to the tool’s likely path? Are you rushing because you’re tired or under time pressure? That ten-second check often reveals a simple adjustment—a clamp, a different stance, a quick change of tool—that dramatically reduces risk.

    Finally, cultivate the habit of stopping when something feels wrong. Unusual resistance, strange vibrations, or an awkward body position are your early warning systems. Instead of pushing through, reset the workpiece, change the tool, or take a break. Over time, these habits become second nature, allowing you to work quickly and confidently without sacrificing safety.

    Hand tools have built homes, repaired machines, and crafted furniture for centuries. With a safer workspace, good protective gear, solid support, and a deliberate mindset, they can serve you for a lifetime without becoming a source of preventable injury.

  • Organizing Hand Tools: Simple Systems That Keep Every Tool Within Reach

    Organizing Hand Tools: Simple Systems That Keep Every Tool Within Reach

    Why Hand Tool Organization Matters More Than You Think

    Ask any experienced craftsperson how much time they spend actually working versus looking for tools, and you may be surprised. A disorganized toolbox or bench quietly drains energy from every project: you re-buy tools you already own, lose momentum hunting for a missing wrench, and sometimes even compromise safety by setting sharp tools wherever there’s space. Thoughtful organization transforms the same set of hand tools into a faster, calmer, and more precise workflow.

    Organizing hand tools is not about perfection or elaborate storage walls. It’s about designing repeatable habits and simple systems that fit how you actually work. Whether you’re in a single-bay garage or a small apartment, you can create an efficient layout that keeps your hammers, screwdrivers, and wrenches ready whenever you need them.

    Start With Zones, Not Containers

    Most people start organizing by buying containers: new boxes, bins, and cabinets. A better approach is to define zones of use first, then choose storage that supports those zones. Ask yourself where you do each type of work—assembly at the bench, mechanical repairs near the car, small repairs at a general-purpose table.

    Once you know your zones, group tools by how and where they’re used:

    Core bench tools: layout tools (tape measures, squares), marking tools (pencils, markers), basic gripping tools (pliers, adjustable wrench), and a general-purpose hammer should live within arm’s reach of your main work surface.

    Mechanical and fastening tools: socket sets, wrenches, nut drivers, and screwdrivers can be grouped together in a zone close to where you typically work on machinery or vehicles.

    Cutting and shaping tools: saws, chisels, files, and rasps benefit from storage that protects their edges and teeth, ideally separated from heavy striking tools that might damage them.

    By starting with zones, you avoid scattering similar tools through different boxes and create a mental map of where everything should be before you touch a single drawer.

    Create a Home for Every Category

    Once your zones are clear, the next step is to give each category a dedicated, obvious home. The goal isn’t military precision; it’s frictionless return. If it’s easy to put a tool back in the right place, you’ll actually do it.

    For drawers, simple foam inserts or dividers go a long way. Cutouts for individual tools are helpful, but even loose groupings—screwdrivers in one section, pliers in another—create enough structure to keep chaos at bay. On pegboards, group items vertically by type. For instance, hang all your pliers in one column, wrenches in another, and hammers together. This makes scanning for a specific tool faster.

    Labeling isn’t just for shared workshops. Labels on drawer fronts, bins, or even tape edges along a shelf reduce hesitation and remind you of the system when you’re tired or in a hurry. Your future self will thank you.

    Choosing Storage: Wall, Drawer, or Mobile?

    Different storage styles suit different tools and spaces. There’s no single best answer, but you can match the storage type to how often and where a tool is used.

    Wall storage (pegboards, slatwall, French cleats) shines for tools you use constantly and want visible at a glance: your primary hammer, measuring tools, a few favorite screwdrivers, and your go-to pliers. Wall systems excel above benches, where frequently used tools are most convenient.

    Drawer storage works well for complete sets and smaller tools: wrench sets, sockets, precision screwdrivers, and small measuring tools like calipers. Shallow drawers are ideal because you see everything at once without stacking.

    Mobile storage—totes, small toolboxes, or tool backpacks—is best for the tools that travel between rooms, vehicles, or job sites. Creating a dedicated “household repair kit” you can grab in one hand reduces trips back and forth when fixing a loose hinge or assembling furniture.

    Often, the most efficient workshop uses all three: wall storage for high-frequency tools, drawers for sets and delicate items, and a small portable kit for work away from the main bench.

    Practical Layout Tips for Common Tools

    Certain categories of hand tools benefit from specific layout choices that make them easier to grab and return.

    Hammers and mallets: Store them with heads up and handles down on hooks or in racks near your main bench. This keeps the weight low and makes it obvious which hammer you’re reaching for. Avoid burying them in a deep box where handles tangle.

    Screwdrivers: Horizontal racks or shallow drawer organizers that show the tips are best. It’s much easier to spot a Phillips #2 by its tip than by the handle. If you have duplicate sizes, group by type and size from smallest to largest.

    Wrenches: Wrench racks or clearly labeled drawer rows eliminate the “shuffle through a pile” problem. If you frequently switch between metric and imperial sizes, consider storing them in separate racks or on opposite sides of the same drawer.

    Pliers: Wall-mounted plier racks or a dedicated shallow drawer work well. Standing pliers vertically in a rack makes it easy to see their jaw patterns and choose the right style—needle-nose, lineman’s, slip-joint, or locking—at a glance.

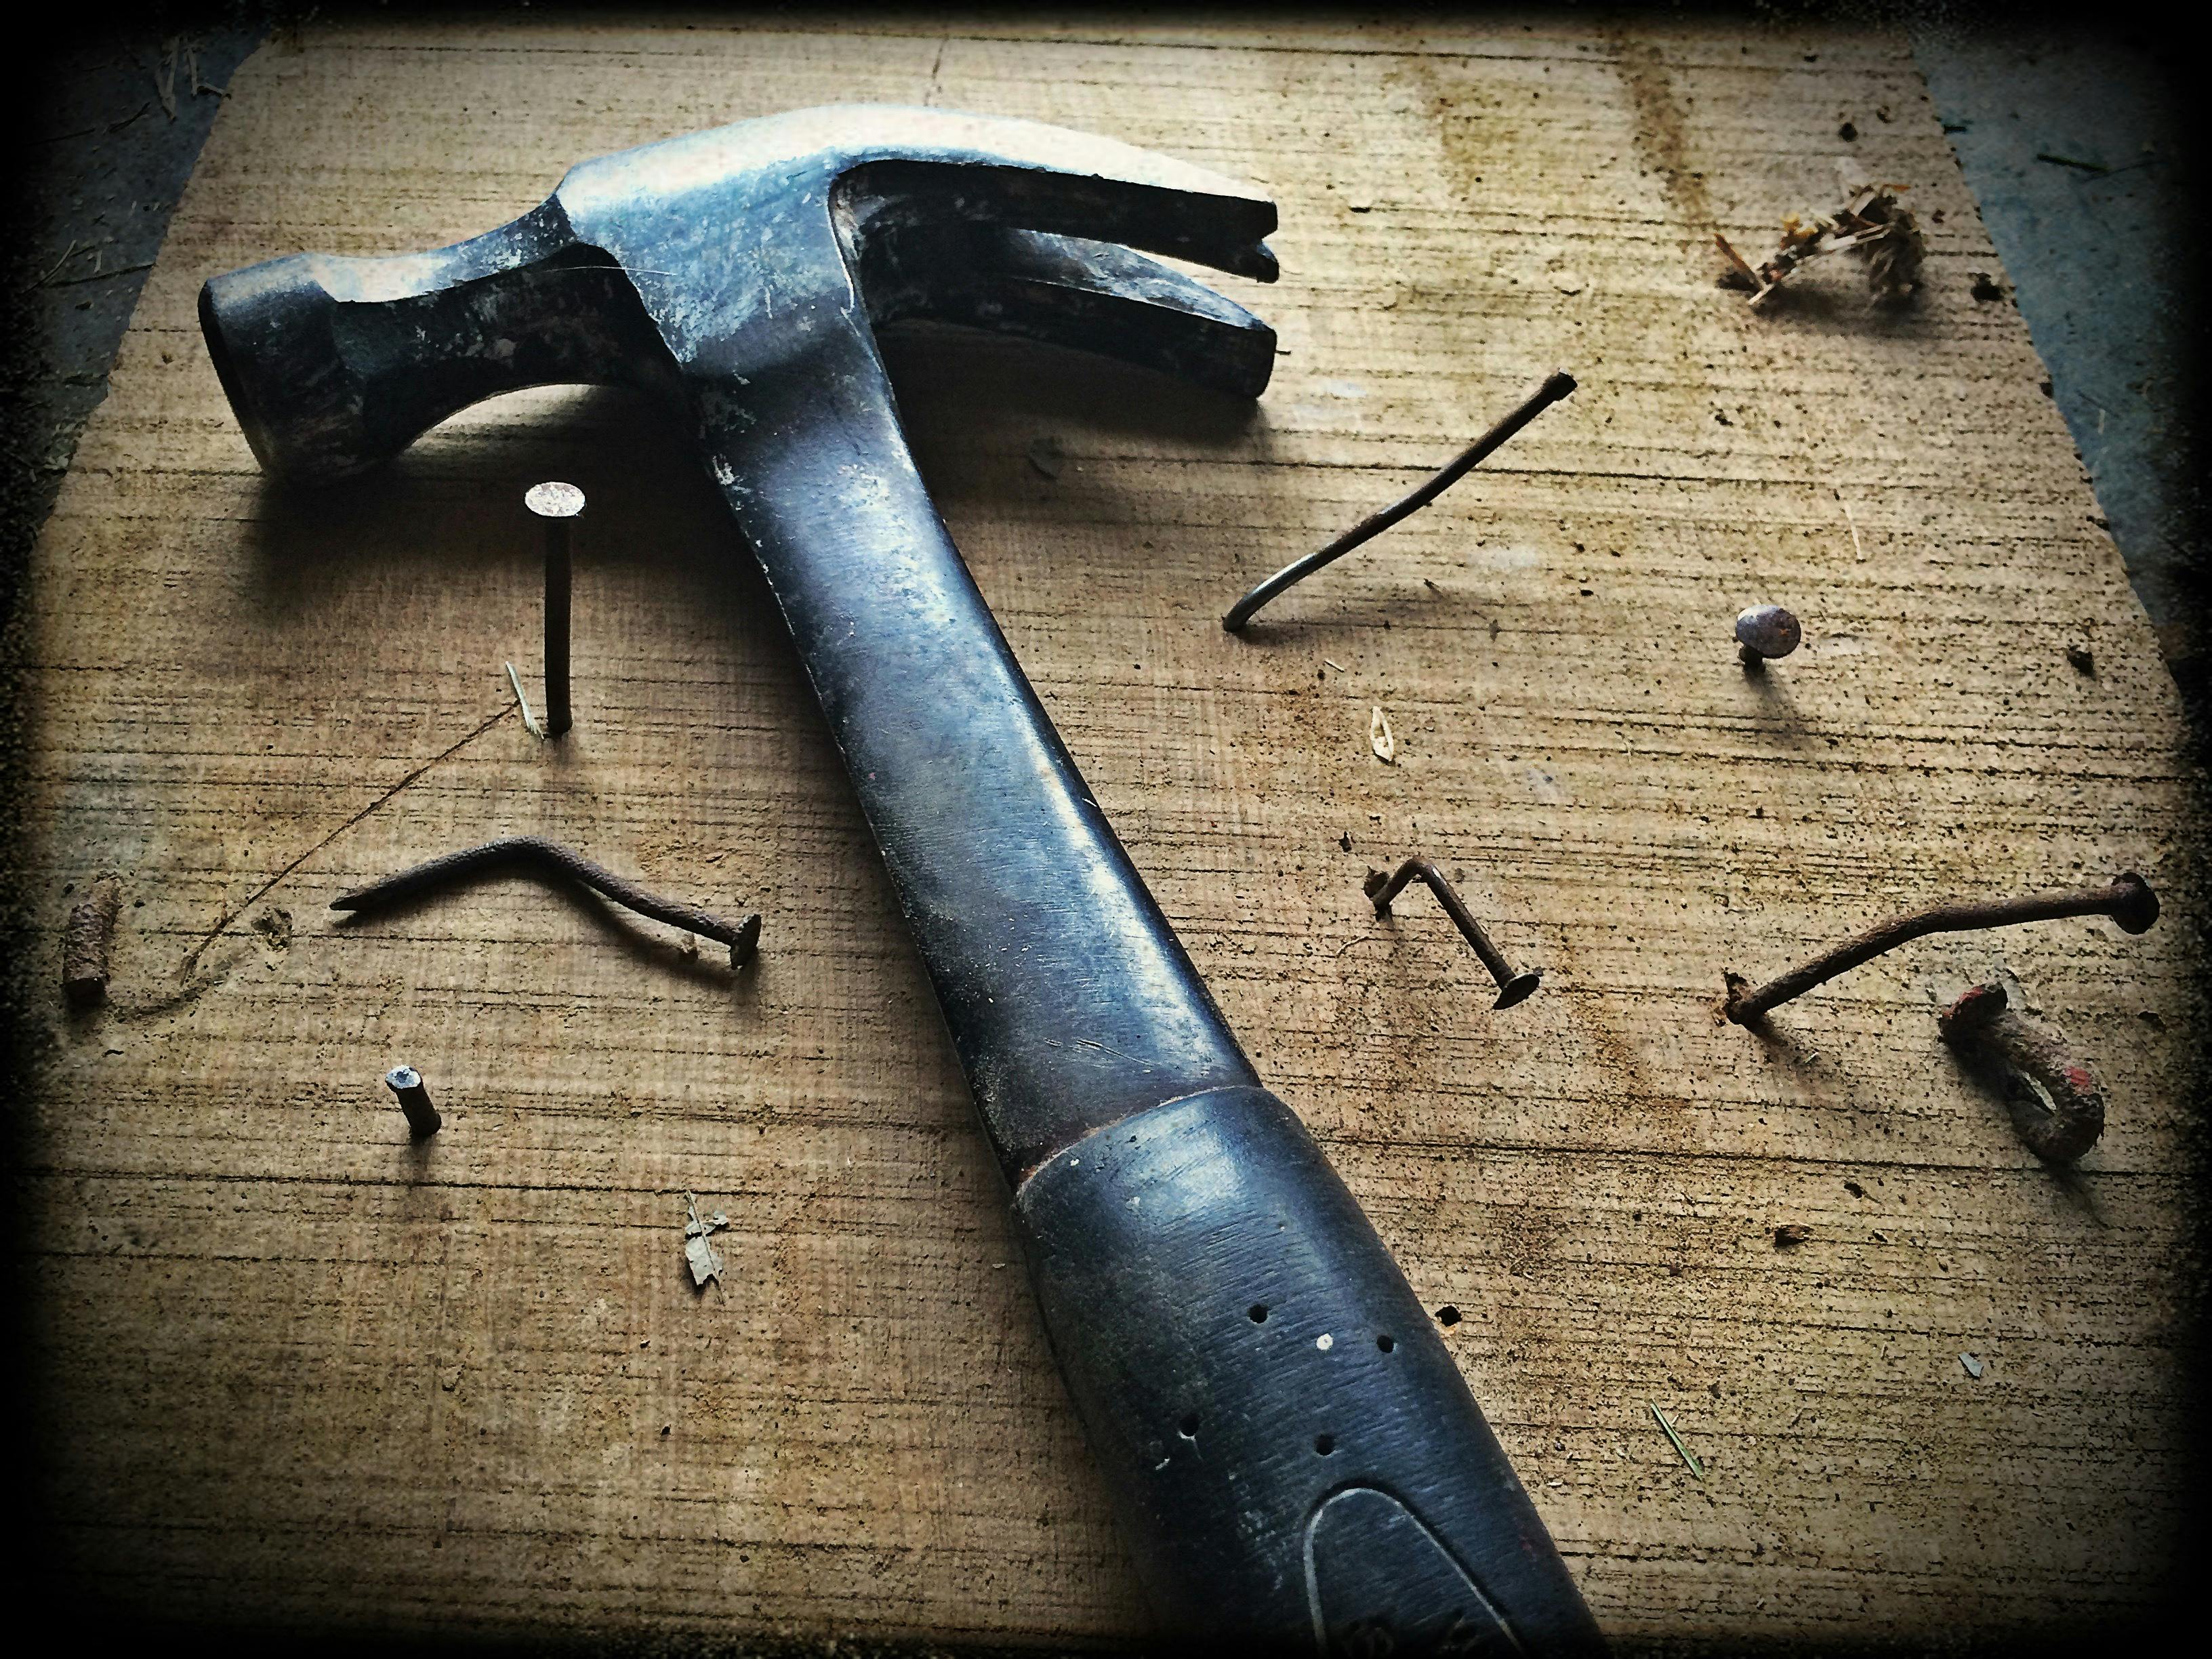
    Assorted hand tools arranged on a wooden surface

    Design for Workflow, Not Just Storage

    Effective organization isn’t only about where tools live—it’s about how they move through your workflow. Think of each project as a loop: tools start in storage, come to the bench, then should naturally find their way back.

    A simple but powerful tactic is a small “in use” tray or magnetic strip near your main work area. As you pull tools from walls or drawers, place them here instead of scattering them across the entire bench. When the project wraps up or you pause for the day, your clean-up consists of returning everything from that tray to its home—not searching under rags or offcuts.

    Similarly, keep consumables and related accessories close to the tools that use them: bits with screwdrivers, blades with saws, replacement inserts with chisels or planes. If you always have the right accessory within reach, you’re less likely to improvise with the wrong tool for the job.

    Dealing With Limited Space

    Many enthusiasts work in shared or tight spaces—a corner of a basement, a balcony, or a small shed. Even here, thoughtful hand tool organization is possible without major carpentry.

    Use vertical surfaces first: the back of doors, the sides of cabinets, and even the ends of shelving units can accept slim racks or pegboard panels. A narrow wall-mounted rack for screwdrivers, pliers, and a single hammer can turn a blank wall into a compact “mini shop.”

    For truly portable setups, think in layers: a small core kit for 80% of tasks and a secondary box for specialized tools. Keep the core kit ultra-accessible, stored near eye level and easy to carry. The specialized box can live on a higher shelf or in a closet, since it’s used less often.

    Maintenance Routines That Reinforce Organization

    Even the best layout fails if you never put tools back. The goal is not to police yourself, but to build simple routines that make order easier than disorder.

    One reliable habit is the “five-minute reset” at the end of a work session. Before turning off the lights, spend five minutes returning tools from your in-use tray to their homes, tossing obvious trash, and staging the bench for your next visit. Knowing that tomorrow’s work will start at a clean bench is often the motivation you need to do that quick reset.

    Every few months, perform a short inventory of each zone. Remove tools that have drifted into the wrong area, identify duplicates you no longer need, and note gaps in your system—for example, realizing your cutting tools don’t have a safe, consistent location. Small adjustments over time are more realistic than one huge re-organization that quickly falls apart.

    Adapting Your System as Your Skills Grow

    As you take on more complex projects, your tool collection and workflow will evolve, and your organization should evolve with them. A layout that worked when you owned one hammer and a few screwdrivers may struggle once you add specialty pliers, precision measuring tools, and multiple wrench sets.

    Instead of clinging to a rigid system, treat your storage as modular. Wall panels, drawer inserts, and racks can all be rearranged as you learn which tools you reach for most often. Pay attention to friction points: if you dread digging out a certain tool, its home likely needs to move.

    In the end, an organized hand tool setup isn’t about impressing visitors—it’s about making your work more enjoyable and effective. When every hammer, screwdriver, and wrench has a clear, logical place, you spend less time searching and more time building, fixing, and creating. That’s the true payoff of a well-organized hand tool collection.

  • Hand Tool Techniques: Classic Skills That Make Every Project Easier

    Hand Tool Techniques: Classic Skills That Make Every Project Easier

    High‑quality hand tools are only half the story. The other half is how you use them. Subtle techniques—how you strike, support, mark, and measure—turn an ordinary toolbox into a precision instrument. This article focuses not on what to buy or how tools are made, but on the practical, time‑tested skills that unlock the full potential of the hand tools you already own.

    ## 1. The Art of Controlled Striking

    Many people think using a hammer is just “hit the thing until it moves.” Skilled users know better.

    ### Use the hammer’s weight, not your arm

    Instead of muscling the hammer, let gravity and the hammer’s head do the work:

    – Keep your grip relaxed, not clenched.
    – Hinge mainly at the elbow and wrist, not the shoulder.
    – Guide the swing in a smooth arc and allow the head to accelerate naturally.

    You’ll drive nails faster, with fewer bent nails and less fatigue.

    ### Start with “taps,” then commit

    For nails, masonry fasteners, or chisels:

    1. **Set the position** with two light taps.
    2. Verify angle and alignment.
    3. Use firm, confident blows once everything is aimed correctly.

    This reduces mis-hits, marred surfaces, and wandering fasteners.

    ### Strike flat, not glancing

    The hammer face should meet the nail or chisel as squarely as possible. A glancing blow can:

    – Bend nails
    – Chip brittle materials
    – Skitter off and damage surrounding surfaces—or fingers

    Practice by driving nails into scrap wood, focusing on keeping the hammer face parallel to the work.

    ## 2. Smart Screwdriving: Preventing Stripped Heads

    Stripped screw heads aren’t just annoying; they can stall an entire project. Technique matters as much as bit quality.

    ### Match tip and screw perfectly

    A screwdriver or bit that “kind of fits” is a recipe for cam‑out. Check that:

    – The tip fully fills the screw recess.
    – There’s minimal side‑to‑side play.

    If you can wiggle the driver in the screw head, choose a different size or style.

    ### Load the screw head with body weight

    For stubborn screws:

    – Align the driver straight with the screw.
    – Lean your upper body weight **directly** down the shaft.
    – Turn smoothly, keeping constant downward pressure.

    This gives the bit more bite and dramatically reduces slipping.

    ### Break the bond before brute force

    If a screw doesn’t want to move:

    – Give the handle a few sharp taps with a hammer (for hand drivers built robustly enough to take it). The impact can break rust or paint bonds.
    – Try tightening just a hair before loosening. This can crack corrosion.

    You’ll often avoid resorting to extractors or drilling.

    ## 3. Clamping and Supporting Workpieces the Right Way

    Many tool mishaps happen not because the tool fails, but because the workpiece moves. Good support and clamping make work safer, faster, and more precise.

    ### Create a three‑point support system

    Any board or workpiece should be supported in at least three places:

    – Two supports prevent tipping but still allow rocking.
    – A third point stabilizes against twisting.

    Use sawhorses, blocks, or a workbench plus clamp to hit three solid contact points.

    ### Clamp for direction of force

    Think about how the force will act on the piece:

    – When hammering, clamp so the force pushes **into** the clamp, not away from it.
    – When sawing, align the clamp so the cut piece doesn’t bind or fall unpredictably.

    You don’t need expensive clamps; a few F‑clamps or quick‑grips used wisely are enough for most tasks.

    ### Protect the surface

    Use scrap pieces (called cauls) between clamps and your workpiece to:

    – Spread clamping pressure.
    – Prevent dents in softwoods and delicate finishes.

    This is especially useful when assembling furniture or cabinetry.

    ## 4. Hand Saw Techniques for Straighter, Faster Cuts

    Hand saws can feel slow or inaccurate until you adopt a few foundational techniques.

    ### Start with a guide notch

    Instead of plunging into the cut at full stroke:

    1. Mark the cut clearly with a pencil and square.
    2. Place the saw teeth right on the waste side of the line.
    3. Use 3–5 short, light strokes to establish a shallow groove.

    That groove keeps the saw tracking exactly where you want it as you shift to longer strokes.

    ### Let the saw do the cutting

    Good saws are designed to cut with minimal pressure:

    – Keep your arm relaxed.
    – Focus on smooth, full‑length strokes.
    – Apply just enough downward force for the teeth to engage.

    If the saw is binding or wandering, forcing it harder rarely helps; check for twisting, poor support, or dull teeth instead.

    ### Stand and line up correctly

    Position your body so the saw, your shoulder, and your eye line are in a straight plane:

    – Stand slightly offset, not square to the board.
    – Look down the line of the cut as if sighting down a rifle.

    This small shift can transform wobbly cuts into accurate ones.

    ## 5. Measuring and Marking Like a Pro

    Accurate work depends on more than having a tape measure. How you measure and mark is critical.

    ### Always mark from the same reference edge

    On any board or part, choose a **reference edge** and base all measurements from it. That way:

    – Small tape errors don’t add up across multiple parts.
    – Pieces that must align share consistent references.

    Mark the reference edge with a light pencil arrow so you don’t lose track.

    ### Use mechanical aids for repeatability

    When you have multiple identical cuts:

    – Clamp a stop block to your workbench or saw guide at the correct distance.
    – Slide each workpiece against the stop rather than measuring each time.

    This eliminates cumulative error and speeds up production.

    ### Mark with intent

    Instead of a vague X somewhere near the line:

    – Draw the cut line thin and sharp using a sharp pencil or marking knife.
    – Add an X on the **waste** side so you remember which side of the line to cut.

    Cutting on the wrong side of a perfect line is a classic beginner mistake that’s easily avoided.

    ## 6. Using Wrenches and Pliers with Maximum Leverage

    Tight fasteners and stuck fittings often turn into a battle. Correct technique makes hand force go much further.

    ### Pull, don’t push, when possible

    With wrenches:

    – Orient the tool so you can **pull** toward your body.
    – Pulling gives you better control and reduces the chance of slipping suddenly and injuring your knuckles.

    When space forces you to push, be deliberate and brace your off‑hand in case the wrench slips.

    ### Use the shortest necessary extension

    Extensions (cheater bars) multiply torque but also increase the chance of snapping fasteners or tools. If you must extend:

    – Use a modest extension and increase force gradually.
    – Support the joint or fitting so it isn’t taking side‑loads.

    Often, penetrating oil plus patient back‑and‑forth movement loosens a joint better than raw force.

    ### Pliers: grip behind the load

    For pliers and adjustable wrenches:

    – Position the jaws so the load sits as deeply as possible, near the pivot.
    – Avoid gripping with just the tips of the jaws.

    This maximizes leverage and prevents rounded corners on nuts and fittings.

    ## 7. Chisels, Files, and Rasps: Shaping with Control

    Shaping tools turn rough cuts into precise fits—if used with finesse.

    ### Chisels: respect the grain

    When paring or chopping:

    – Keep the **bevel side facing the waste** for controlled cuts.
    – Work **with** the grain whenever possible; going against it invites splitting.
    – Take thin slices, not deep bites, especially near final dimensions.

    A mallet made of wood or rubber, not steel, gives better feel and preserves the chisel handle.

    ### Files and rasps: lift on the return stroke

    Most files and rasps cut in **one direction**:

    – Apply pressure on the cutting stroke.
    – Lift or lighten pressure on the return stroke.

    Dragging back under pressure dulls the teeth and clogs the tool.

    Use a file card or stiff brush frequently to keep the teeth clear; a clean file cuts faster and straighter.

    ## 8. Developing Your Hand Tool “Feel”

    The most valuable technique is learning to listen and feel what your tools are telling you.

    – **Sound**: A saw that suddenly squeals, a screwdriver that clicks as it cams out, or a dull thud instead of a crisp chisel strike all signal trouble.
    – **Resistance**: If a tool suddenly needs much more force, stop. Something has changed—grain, material, angle, or a hidden obstruction.
    – **Vibration**: Excess buzz in a hammer blow or chisel strike often means poor support or a loose joint.

    Make a habit of pausing when something feels off, rather than pushing through. Those pauses prevent broken tools, damaged work, and injuries.

    —

    Mastering technique doesn’t require expensive gear or a dedicated workshop. It’s about paying attention to body position, support, and the subtle feedback your tools provide. Practice these skills on scrap materials, notice what changes when you adjust your grip or stance, and your existing hand tools will start performing at a much higher level—no new purchases required.

  • Essential Hand Tool Selection: Building a Smart, Versatile Kit Without the Clutter

    Walk into any hardware store and it’s easy to walk out with a basket full of shiny tools you’ll barely use. A smarter approach is to build a deliberate, versatile hand tool kit that covers real work without wasting money or space. Whether you’re setting up a first toolbox or upgrading a scattered collection, understanding how to select the right tools—and avoid redundant or gimmicky ones—will save time, frustration, and cash.

    ## 1. Start With Tasks, Not Tools

    Before buying anything, define what you actually do—or plan to do:

    – **Home repairs and assembly** (furniture, fixtures, small plumbing fixes)
    – **Automotive work** (fluids, brake jobs, light engine work)
    – **Woodworking** (joinery, cabinetry, rough carpentry)
    – **Electrical work** (outlets, lighting, low-voltage installs)
    – **Metalwork and fabrication** (cutting, filing, shaping metal)

    List the top 10–15 tasks you’re likely to encounter in the next year. Then work backward: which hand tools are essential to complete those tasks safely and efficiently? This task-first mindset stops impulse buys and keeps your kit focused.

    ## 2. The Core Toolkit: Tools Almost Everyone Should Own

    Across disciplines, a handful of hand tools pull weight in nearly every setting. These are worth buying once and buying well.

    **1. Screwdrivers**
    – A set including: #1 and #2 Phillips, slotted in 3–4 common sizes.
    – Add a precision set if you work on electronics or small hardware.
    – Consider a quality multi-bit driver for space saving, but keep at least one dedicated #2 Phillips for high-torque jobs.

    **2. Pliers**
    – Combination (lineman’s) pliers for cutting and gripping.
    – Long-nose pliers for reaching into tight spaces.
    – Slip-joint or adjustable groove-joint pliers for plumbing and odd-shaped parts.

    **3. Adjustable Wrench and Basic Spanners**
    – One medium adjustable wrench (around 10″) for general tasks.
    – A small selection of combination wrenches in the most common sizes for your region and typical work (e.g., 10, 12, 13, 17 mm or 3/8″, 7/16″, 1/2″, 9/16″).

    **4. Hammer**
    – A 16–20 oz claw hammer covers general carpentry and household work.
    – If you do finished work, a smoother-faced hammer avoids marring surfaces.

    **5. Cutting Tools**
    – A retractable utility knife with quality blades.
    – A pair of diagonal cutters for wire and small fasteners.
    – A handsaw or pull saw if you occasionally cut wood.

    **6. Measuring and Marking**
    – 5–8 m (16–25 ft) tape measure with clear markings.
    – Combination square for marking and checking right angles.
    – A simple carpenter’s pencil or fine-tip marker.

    With just these, you can already tackle most household jobs. Everything else should be added only when you have a clear use case.

    ## 3. Expanding Your Kit by Category

    After you have the core tools, expand deliberately based on the kind of work you do most.

    ### For Home and Property Maintenance

    – **Stud finder** and **torpedo level** for hanging shelves and fixtures.
    – **Hex key (Allen) set**, both metric and SAE, for furniture and hardware.
    – **Small pry bar or flat bar** for pulling nails and lifting trim.
    – **Caulking tool** (scraper/spreader) for sealing gaps and joints.

    These additions stay compact but dramatically expand what you can handle around the house.

    ### For Automotive and Mechanical Work

    – **Socket set** with ratchet: start with 1/4″ and/or 3/8″ drive, metrics and SAE if you work on mixed vehicles.
    – **Spark plug socket** sized for your engine.
    – **Extension bars** and a **universal joint** for awkward angles.
    – **Line wrenches** (flare nut wrenches) for brake and fuel lines.

    Here, coverage of sizes and access to tight spaces are more important than having every possible tool shape.

    ### For Woodworking and Carpentry

    – **Block plane** for quick smoothing and fitting.
    – **Set of wood chisels** for joints and mortises.
    – **Marking gauge** for repeatable layout.
    – **Hand saws** chosen by task: rip, crosscut, or a Japanese pull saw.

    Don’t buy full sets “just because.” Add tools one by one as your projects demand finer techniques.

    ### For Electrical and Low-Voltage Work

    – **Dedicated wire strippers** for clean, consistent stripping.
    – **Insulated screwdrivers** rated for electrical work.
    – **Crimping tool** sized for the connectors you use.
    – **Non-contact voltage tester** for safety when working near live circuits.

    In this category, correct sizing and electrical safety ratings matter more than brute strength.

    ## 4. Choosing Between Singles, Sets, and Multi-Function Tools

    Tool buyers often wrestle with three options: buying singles, buying complete sets, or relying on multi-function tools.

    ### Singles

    **Best when:**
    – You know exactly which sizes you’ll use.
    – You’re building gradually and prefer higher-quality pieces.

    Singles are ideal for wrenches, sockets, and pliers in your most-used sizes. They prevent you from owning fifteen sizes you’ll never touch.

    ### Sets

    **Best when:**
    – You’re starting from almost nothing.
    – You’re entering a new category (e.g., first socket set, first chisel set).
    – You need coverage for unknown fastener sizes (e.g., used cars, machinery).

    Choose sets that:
    – Focus on core sizes over exotic or rarely used ones.
    – Include solid storage (case, rack, or roll) to keep pieces organized.

    ### Multi-Function Tools

    Multi-bit screwdrivers, adjustable wrenches, and multi-tools look appealing, but they’re not a universal replacement.

    **Use them when:**
    – Portability is key (tool bag in the car, travel kit).
    – You need a “grab-and-go” solution for light work.

    **Avoid relying on them when:**
    – You expect high torque or heavy use.
    – Precision fit is critical (fine woodworking, professional mechanical work).

    Use multi-function tools as complements, not as the backbone of your kit.

    ## 5. Avoiding Common Buying Mistakes

    Many toolboxes end up cluttered and inconsistent because of a few predictable errors.

    ### Buying Too Cheap for Critical Tools

    Some tools are used under high load and can cause injury or damage if they fail: wrenches, sockets, pliers, striking tools. For these, avoid the cheapest options. Choose mid-range or better with proven reliability.

    ### Buying Premium Where It Doesn’t Matter

    On the other hand, you don’t need top-tier brands for:
    – Putty knives
    – Basic clamps for light duty
    – Layout tools used infrequently

    Direct your budget first to tools that see frequent use or high stress.

    ### Falling for Gimmicks

    Tools with built-in flashlights, awkward pivoting heads, or extreme adjustment ranges often sacrifice durability and ergonomics. If you can’t identify a specific, recurring problem a fancy tool solves, skip it.

    ### Overlapping Tools

    You don’t need:
    – Four almost-identical adjustable wrenches.
    – Three screwdriver sets that all cover the same sizes.
    – Multiple complete socket sets when you only use half the sizes.

    When adding a tool, ask: does this genuinely do something my current tools cannot?

    ## 6. Organizing as You Build: The Hidden Part of Selection

    Selecting tools isn’t just about which ones you buy—it’s about how you store and access them.

    – **Start with a layout in mind.** Decide whether you want a toolbox, a tool bag, a wall panel, or drawer systems.
    – **Group by function.** Keep screwdrivers together, pliers together, etc., so you can see at a glance what you have and what’s missing.
    – **Label or color-code.** For sets, labels on drawers or trays reduce hunting and highlight gaps.

    A well-organized kit prevents buying duplicates and makes it obvious when you truly need a new addition.

    ## 7. Building in Stages: A Practical Roadmap

    Instead of trying to assemble a dream kit in one shot, use a phased approach.

    **Phase 1: Core Essentials**
    Cover the basics: screwdrivers, hammer, pliers, adjustable wrench, tape measure, utility knife. This phase enables everyday fixes.

    **Phase 2: Task-Driven Additions**
    For each new project, list the tools required. Buy what you’re missing—prioritizing quality for items you’ll reuse frequently.

    **Phase 3: Refinement and Upgrades**
    As you gain experience, you’ll discover favorite tools and frequent frustrations. Upgrade workhorse tools and shed redundant or poor performers. Replace multi-function stand-ins with dedicated, high-quality tools where needed.

    Over time, you’ll end up with a lean, capable hand tool kit tailored to your real work rather than a catalog’s idea of what you should own.

    —

    Thoughtful selection is what separates a jumble of metal from a true working kit. By focusing on tasks, choosing quality where it counts, avoiding redundancy, and expanding in deliberate stages, you build a collection of hand tools that actually earns its space—ready for whatever project comes next.

  • From Raw Stock to Reliable Steel: How Quality Hand Tools Are Really Made

    Most people judge a hand tool by how it feels in the hand and how well it performs on the job. But behind that satisfying click of a ratchet or the solid swing of a hammer is a complex story of material science, manufacturing choices, and quality control. Understanding how hand tools are made can help you buy smarter, spot junk before it fails, and appreciate why some tools cost more—but earn their keep for decades.

    ## 1. Why Tool Steel Matters More Than the Logo

    Every hand tool begins with a material choice, and for most load‑bearing tools, that means steel. Not all steel is equal, and the recipe used determines hardness, toughness, and resistance to wear or rust.

    Common steels in hand tools include:

    – **High Carbon Steel** – Used where edge retention and strength matter, such as chisels, cutting pliers, and some screwdrivers. It can be hardened deeply but, if taken too far, becomes brittle.
    – **Chrome-Vanadium (Cr-V)** – A popular alloy for wrenches, sockets, and ratchets. It balances hardness with toughness and resists fatigue and deformation.
    – **Chrome-Molybdenum (Cr-Mo)** – Often used in impact-rated sockets and tools that endure repeated shock loads. It handles sudden torque spikes better than standard alloys.
    – **Stainless Steels** – Used where corrosion is a concern (marine work, outdoor kits), but often at the cost of ultimate hardness and wear resistance.

    Better manufacturers don’t just pick a steel grade; they choose precise formulations and apply controlled heat treatment to unlock the steel’s full potential. That’s why two wrenches labeled “Cr-V” can perform very differently in real use.

    ## 2. Forged vs. Cast vs. Stamped: The Shape of Strength

    Once the steel is chosen, the next big decision is how to shape it. The three primary methods each bring trade-offs in strength, cost, and precision.

    ### Forged Tools

    Forging compresses heated metal into shape using dies and hammering force. The process realigns the grain structure of steel so it flows along the contours of the tool.

    **Benefits of forging:**
    – Grain structure follows the shape, increasing overall strength and resistance to fracture.
    – Better suited to tools that experience high torque or impact (wrenches, hammer heads, pry bars).
    – Typically higher quality and longer life.

    Closed-die forging (near-net shape forging) creates precise, repeatable dimensions, which require less machining later. That’s why quality spanners and pliers often advertise “drop-forged steel.”

    ### Cast Tools

    Casting involves melting metal and pouring it into molds. After cooling, the rough shape is machined to tolerance.

    **Pros:**
    – Complex shapes are easier and cheaper to produce.
    – Good for large tools where ultra-high strength isn’t the primary need.

    **Cons:**
    – Grain structure is random, which can introduce weak points.
    – More prone to cracking or shattering under extreme stress if not carefully engineered and heat-treated.

    Cheap cast tools (often with rough surfaces or suspiciously light weight) are common failure points in budget tool kits.

    ### Stamped and Formed Tools

    Stamping starts with sheet or strip steel and uses dies to cut and form it into shape. Think of feeler gauges, some types of wrenches, and shims.

    **Advantages:**
    – Very consistent dimensions.
    – Cost-effective for thinner or flat tools.

    If the base steel is good and thickness is appropriate, stamped tools can be surprisingly strong, especially when formed with reinforcing bends, ribs, or flanges.

    ## 3. The Quiet Hero: Heat Treatment

    Heat treatment is where a plain steel blank becomes a real tool. It’s a carefully timed combination of heating, holding, and cooling that transforms the internal structure of the metal.

    Key steps often include:

    – **Hardening** – Heating steel to a specific temperature and then cooling it rapidly (quenching in oil, water, or air). This increases hardness but also brittleness.
    – **Tempering** – Reheating the hardened steel to a lower temperature and holding it there, then cooling it. This trades a bit of hardness for toughness and shock resistance.
    – **Case Hardening / Surface Hardening** – Only the outer layer is hardened, leaving the interior tough and flexible. Useful for tools that need a hard wear surface but shouldn’t snap under load.

    The difference between a screwdriver tip that twists on first use and one that bites cleanly into screws is often just the quality of heat treatment. Good manufacturers invest heavily in controlled furnaces, quench media, and testing to dial this in.

    ## 4. Cutting, Grinding, and Machining: Getting to Final Shape

    Once the basic form is forged, cast, or stamped, it’s time to refine it. This is where the tool’s functionality is truly shaped.

    Common operations include:

    – **CNC Machining** – Used for precision surfaces like ratchet mechanisms, wrench jaws, and screwdriver tips. Tight tolerances mean less slop and better feel.
    – **Grinding** – Puts bevels on chisels, angles on pliers, and flat surfaces on wrenches. Good grinding leaves crisp edges without overheating the steel.
    – **Broaching** – Used in socket production; a toothed tool cuts the internal shape (hex, Torx, etc.) accurately and consistently.

    You can often spot quality work in the small details: jaws on pliers that meet perfectly, wrench openings that fit snugly on a fastener, or a screwdriver tip that matches the screw profile exactly instead of being vaguely “close.”

    ## 5. Surface Treatments: More Than Just Good Looks

    Finishing isn’t just cosmetic. Surface treatments protect tools from rust, reduce friction, and sometimes even improve grip.

    Common finishes include:

    – **Chrome Plating** – Shiny, corrosion-resistant, and easy to clean. Found on many wrenches, sockets, and ratchets. Poor chrome may flake; quality chrome is smooth and durable.
    – **Black Oxide** – A thin, matte finish that offers mild rust resistance and reduces glare. Often seen on drill bits and some sockets.
    – **Phosphate / Manganese Phosphate** – Dark gray finish used on impact sockets and military-grade tools. Holds oil well and resists corrosion.
    – **Powder Coating or Paint** – Adds color coding and corrosion resistance, especially for handles or large striking tools.

    Bare or lightly finished tools (like some premium chisels) rely more on the owner to keep them clean and oiled, but they can be easier to regrind, resharpen, or modify.

    ## 6. Handles and Inserts: Where Metal Meets Human

    While ergonomics focuses on comfort and technique, the construction of handles themselves is a manufacturing story of its own.

    Common handle materials:

    – **Wood (Hickory, Ash)** – Traditional for hammer and axe handles. Good shock absorption, easily replaceable, and comfortable in the hand.
    – **Fiberglass and Composites** – Strong, consistent, and highly resistant to moisture. Often combined with rubber grips.
    – **Overmolded Plastics and Rubber** – Used on screwdrivers and pliers. A rigid core provides strength while a softer outer layer improves grip and reduces vibration.

    The connection between handle and tool head (wedging, epoxy, mechanical locks) is critical. A loose hammer head or twisting screwdriver handle isn’t just annoying; it’s dangerous. Quality brands design robust mechanical interfaces, not just cosmetic coverings.

    ## 7. Quality Control: How Good Tools Earn Their Stamp

    Behind every reliable tool is a trail of tests. Proven manufacturers don’t rely on guesswork; they measure, stress, and inspect.

    Typical quality measures include:

    – **Hardness Testing** – Using Rockwell or Vickers scales to ensure the heat treatment hit its target.
    – **Torque and Load Testing** – Applying controlled force until failure to define safe working limits—and then designing with a margin.
    – **Dimensional Inspection** – Checking critical dimensions with gauges and coordinate measuring machines (CMMs).
    – **Fatigue Testing** – Repeated loading cycles to simulate years of use and identify weak designs.

    This testing is a big part of why reputable tools cost more—and why they’re less likely to fail catastrophically when you lean on them.

    ## 8. How to Use Manufacturing Clues When You Buy

    You don’t need a metallurgy degree to spot better tools; you just need to know what to look for.

    When evaluating a hand tool in person:

    – **Check the markings** – Clear, stamped or etched markings (size, alloy, brand) often indicate higher attention to detail than faint, painted labels.
    – **Feel the weight and balance** – Extremely light tools of significant size can be a red flag for poor alloys or hollow construction where it doesn’t belong.
    – **Inspect the surfaces** – Uniform finish, clean edges, and properly aligned jaws or tips are all signs of careful manufacturing.
    – **Look at critical interfaces** – For wrenches and sockets, the contact areas should be smooth, with well-defined flats and corners, not rounded or lumpy.

    Understanding how tools are made turns shopping from guesswork into informed selection. Instead of just comparing price tags, you’re reading the story written in metal, heat treatment, and finish—and choosing tools that will earn a permanent place in your toolbox.

  • Mastering Grip and Control: Ergonomics of Hand Tools for Safer, Smarter Work

    When most people think about hand tools, they focus on strength, durability, or brand reputation. What often gets overlooked is how a tool feels in the hand—and how that feeling affects safety, precision, and fatigue. That’s the realm of ergonomics: designing tools to fit the human body, rather than forcing your body to adapt to the tool.

    Understanding hand tool ergonomics can transform how you work. Whether you’re a homeowner driving a few screws on the weekend or a professional with tools in hand eight hours a day, the way tools interact with your muscles, joints, and nerves matters more than you might think.

    ## Why Ergonomics Matters for Hand Tools

    Ergonomics is about efficiency and comfort, but at a deeper level, it’s about injury prevention and performance.

    **1. Reduced strain and fatigue**
    Poorly designed or poorly chosen tools force your muscles to work harder. Over time, this builds fatigue, reduces accuracy, and slows you down. With ergonomic tools, the same job typically requires less effort and fewer awkward motions.

    **2. Lower risk of injury**
    Repetition, force, and awkward wrist positions can contribute to issues like tendonitis, carpal tunnel syndrome, and general joint pain. Ergonomic handles and appropriate tool sizing minimize these risk factors.

    **3. Better control and accuracy**
    Tools that fit your hand properly give you better grip and more predictable control. That translates into straighter cuts, properly torqued fasteners, and fewer slips that can damage workpieces—or your fingers.

    ## The Three Pillars of Ergonomic Hand Tools

    When evaluating the ergonomics of a hammer, screwdriver, wrench, or any other hand tool, it’s helpful to think in terms of three pillars: grip, posture, and force.

    ### 1. Grip: Matching the Tool to Your Hand

    Your hand size, hand strength, and the type of work you’re doing all affect what “good grip” means.

    **Handle diameter**
    – For power grips (like holding a hammer or large pipe wrench), a slightly larger diameter—often around 1.25–1.75 inches (3–4.5 cm) for most adults—lets you wrap your fingers fully without overlapping too much.
    – For precision grips (like a small screwdriver or an electrician’s screwdriver), a slimmer handle gives you fine control without straining your fingers.

    **Handle length**
    A handle should extend beyond the base of your palm without digging into your wrist. Too short, and you compensate by squeezing harder or bending your wrist; too long, and the tool may feel unbalanced.

    **Surface texture**
    – Smooth metal can slip, especially when your hands are sweaty, oily, or gloved.
    – Overly aggressive textures or sharp checkering can create pressure points or blisters.
    – The sweet spot is a grippy, slightly compliant surface (like rubber or textured plastic) that stays stable without biting into your skin.

    **Handedness and symmetry**
    Most hammers, wrenches, and basic screwdrivers are symmetrical enough for both left- and right-handed users. But specialized tools with shaped or offset handles should be checked carefully—some are designed primarily for right-handed users.

    ### 2. Posture: Keeping Wrists and Joints in Neutral

    Your joints are strongest and most comfortable when they’re close to a neutral position.

    **Wrist alignment**
    – Look for tools that allow your wrist to stay straight as much as possible, especially with repetitive tasks.
    – Long-handled screwdrivers or ratcheting drivers can help you keep your wrist in line with your forearm.
    – Offset or angled handles on certain wrenches or pliers can actually improve posture if they let you apply force without twisting your wrist.

    **Reach and leverage**
    If a tool forces you to overextend your arm or lean your body awkwardly, it’s not ergonomic for that task—even if the tool itself is well-designed. For example:
    – A short wrench on a fastener buried deep in an engine bay can encourage overreaching and awkward angles. An extra-long box wrench or a ratchet with an extension lets you maintain a better body posture.
    – Stubby screwdrivers make sense in tight spaces, but they’re not ideal for general use where a longer driver keeps your wrist straighter and requires less pinch force.

    **Body alignment**
    Hand tools don’t operate in isolation; they’re part of your larger movement chain. Whenever possible:
    – Face your work directly instead of twisting your torso.
    – Position the workpiece at a comfortable height, roughly between mid-thigh and elbow for most tasks.
    – Use a bench, vise, or clamps so your hands focus on guiding the tool, not holding the work steady.

    ### 3. Force: Let the Tool Do the Work

    Ergonomics doesn’t mean avoiding force—it means applying it efficiently.

    **Leverage vs. muscle**
    – Longer handles increase leverage but can become unwieldy or create control issues.
    – Shorter handles give great control but require more muscle.
    – For recurring tasks, you want a balance that lets you apply needed torque without white-knuckling the handle.

    **Tool weight and balance**
    – A hammer that’s too heavy tires your arm quickly; one that’s too light forces you to swing harder. The right weight lets the head do most of the work with a natural swing.
    – With screwdrivers and nut drivers, a well-balanced tool feels like an extension of your hand, not a top-heavy club.

    **Ratcheting and mechanical assistance**
    Modern versions of traditional tools often build in mechanical advantages:
    – Ratcheting wrenches and drivers reduce repetitive motions and awkward resets.
    – Compound-leverage pliers (like some wire cutters) multiply input force, reducing the strain of repeated cuts.

    ## Choosing Ergonomic Versions of Common Hand Tools

    You don’t necessarily need to replace everything you own, but understanding ergonomic features can guide future purchases.

    **Hammers**
    – Look for a handle that fits your hand without forcing a tight grip.
    – Shock-absorbing materials (fiberglass, composite, or cushioned grips) reduce vibration.
    – Try a few head weights—many users find 16–20 oz for general use strikes a comfortable balance.

    **Screwdrivers**
    – Choose a handle large enough that you can apply torque without pinching your fingers.
    – A slightly bulbous or contoured handle often improves comfort over skinny, straight handles.
    – Consider ratcheting drivers for repetitive fastening, which keep your wrist in a more neutral, less-twisty position.

    **Wrenches**
    – Box-end and combination wrenches with offset heads can reduce knuckle-busting and awkward wrist angles.
    – Ratcheting box wrenches cut down on repeated lifting and repositioning.
    – Try a few handle thicknesses; extremely thin wrenches can dig into your hand under load.

    **Pliers and cutters**
    – Check that the handle span isn’t too wide when fully open. If your fingers can’t comfortably wrap around the grips, you’ll strain to close them.
    – Cushioned grips help, but the underlying handle shape must still suit your hand.
    – For repetitive cutting or crimping, look for models with spring return and compound leverage.

    ## Practical Tips for Using Hand Tools Ergonomically

    Tool design is only half the equation; usage habits matter just as much.

    1. **Alternate tasks when possible**
    Avoid doing the same motion for long stretches. Switching between cutting, fastening, and measuring gives certain muscle groups a break.

    2. **Use the right tool for the job**
    Prying with a screwdriver, hammering with a wrench, or using undersized pliers forces awkward grips and overloads tools not meant for that stress.

    3. **Adjust your grip**
    You don’t need a crushing grip for every task. Relax your hold when appropriate and use a firmer hold only when applying real force.

    4. **Take short, regular breaks**
    Micro-breaks of 20–30 seconds let your hands and forearms recover, especially during repetitive work like driving multiple screws or cutting many pieces of material.

    5. **Listen to early warning signs**
    Numbness, tingling, pain, or excessive fatigue are signals that something needs changing—your tool, your technique, or your work height and posture.

    ## Building an Ergonomic Hand Tool Kit Over Time

    You don’t need a complete overhaul overnight. Instead:

    – **Upgrade your most-used tools first.** If you use a screwdriver or set of pliers every day, that’s where ergonomic improvements will pay off fastest.
    – **Test tools in person when you can.** Pick them up, mimic real motions, and pay attention to wrist angle, pressure points, and how naturally they move with you.
    – **Consider your specific work.** A carpenter, mechanic, and homeowner all have different repetition levels and force demands; build around your reality, not generic advice.

    In the end, hand tool ergonomics is about respect—for your body as much as for your tools. By choosing and using tools that support natural movement, you’ll work safer, feel better at the end of the day, and often get cleaner, more precise results. Instead of fighting your tools, you’ll let them become comfortable, efficient extensions of your hands.

  • Precision and Care: How to Maintain Hand Tools for a Lifetime of Use

    Hand tools are often bought with care, used with enthusiasm, and then quietly neglected. Yet the difference between a frustrating, knuckle‑busting task and a clean, satisfying result often comes down to how well your tools are maintained. Proper care can turn an inexpensive screwdriver or a mid‑range wrench into a dependable companion that lasts for decades.

    This guide focuses specifically on maintaining your hand tools so they stay safe, accurate, and pleasant to use. Think of it as preventative medicine for your toolbox.

    ## Why Hand Tool Maintenance Matters

    Hand tools may not have batteries or motors, but they still wear out. Handles crack, metal corrodes, jaws slip, and edges dull. The consequences range from minor inconvenience to serious injury:

    – **Safety risks**: A rusty adjustable wrench that suddenly slips, or a chipped screwdriver tip that pops out of a screw head, can easily lead to cuts, bruises, or eye injuries.
    – **Reduced accuracy**: Bent rulers, dinged levels, and sloppy pliers compromise the precision of your work.
    – **Increased effort**: Dull cutters and stiff mechanisms force you to use more strength, leading to fatigue and mistakes.
    – **Higher costs over time**: Consistent basic care usually costs less than regularly replacing neglected tools.

    Maintenance is not just about preserving value—it’s about working smarter and with less frustration.

    ## Step 1: Clean Tools After Every Use

    The single most important habit is simple: **clean as you go**. Dirt, metal filings, adhesives, and moisture are the primary enemies of any hand tool.

    ### General cleaning routine

    1. **Dry brush or wipe**: Use a rag or soft brush to remove sawdust, metal shavings, or debris.
    2. **Spot cleaning with mild detergent**: For sticky residues (like oil, grease, or adhesive), use a bit of warm water with dish soap on a cloth. Avoid soaking wooden handles or immersing tools.
    3. **Dry thoroughly**: Moisture left behind is a direct invitation to rust.
    4. **Light protection**: For metal surfaces, a quick wipe with an oily rag (light machine oil or dedicated tool oil) forms a thin protective film.

    ### Special cases

    – **Resin and glue**: Scrape gently with a plastic scraper or use a solvent compatible with the residue and the tool’s finish. Test solvents on a small area first.
    – **Masonry dust**: Concrete and mortar dust are highly abrasive. Remove them with compressed air or a stiff brush and avoid grinding them into moving parts.

    ## Step 2: Rust Prevention and Removal

    Most hand tools are either made of carbon steel, alloy steel, or have some sort of plated finish. All of them benefit from rust prevention.

    ### Preventing rust

    – **Control moisture**: Store tools in a dry space. Basement humidity is a common problem; a small dehumidifier or desiccant packs in drawers can help.
    – **Use protective coatings**:
    – Wipe exposed steel with a light coat of oil.
    – For tools you rarely use, consider a wax coating (paste wax or specialized tool wax) on the metal.
    – **Avoid direct concrete contact**: Concrete can hold moisture. Use wooden boards, mats, or shelves instead of placing tools directly on concrete floors.

    ### Removing light rust

    If rust has just started to form:

    1. Rub with fine steel wool or a scouring pad and a bit of oil.
    2. Wipe clean and re‑oil.

    For more noticeable surface rust:

    1. Use a rust eraser or fine abrasive pad.
    2. Work slowly to avoid scratching measuring surfaces or plated finishes.

    ### Dealing with heavier rust

    Heavier corrosion on non‑critical tools (like old garden or demolition tools) may respond to:

    – Soaking in a commercial rust remover following the instructions carefully.
    – Using a wire brush on a drill or bench grinder, but sparingly—excess heat can damage temper or plating.

    For precision tools, it’s often worth being conservative; preserve flatness and reference faces above all.

    ## Step 3: Inspect and Service Moving Parts

    Many hand tools rely on smooth, controlled movement: adjustable wrenches, ratchets, locking pliers, clamps, and more. Grit and dried lubricants can turn a smooth mechanism into a struggle.

    ### Routine inspection

    Look for:

    – Looseness or excessive play in joints
    – Stiff or gritty movement
    – Bent or misaligned members
    – Worn teeth or pawls in ratcheting mechanisms

    ### Cleaning and lubrication

    1. **Disassemble where appropriate**: Follow the tool’s design—some ratchets, for example, are meant to be opened; others are sealed.
    2. **Remove old grease**: Use a solvent like mineral spirits on a brush or rag. Dry thoroughly.
    3. **Lubricate lightly**:
    – Use light machine oil for hinges and pivots.
    – Use appropriate grease for ratchets or high‑load joints.
    4. **Avoid over‑lubrication**: Excess oil or grease attracts dust, which creates an abrasive paste.

    ## Step 4: Care for Wooden and Composite Handles

    Handles are often the first part of a tool to fail, even when the metal components are still serviceable.

    ### Wooden handles

    – **Inspection**: Look for cracks, splinters, looseness at the head, and signs of rot.
    – **Sanding**: Lightly sand splintered areas with fine‑grit sandpaper, always along the grain.
    – **Conditioning**: Apply boiled linseed oil or a dedicated wood oil periodically. This helps resist moisture and keeps the wood from becoming brittle.
    – **Tightening**: If a head becomes loose, inspect the wedge. Sometimes, driving the wedge deeper or adding a new wedge is possible; otherwise, the handle may need replacement.

    ### Plastic and composite handles

    – **Cleaning**: Wipe with mild soap and water. Avoid harsh solvents that can weaken plastic.
    – **Check for cracks**: Impact damage can cause hidden fractures; if a handle flexes or creaks under normal use, retire the tool.

    ## Step 5: Sharpening and Edge Care

    Not all hand tools cut wood or metal, but many include cutting or striking faces—chisels, punches, scribes, and even certain screwdrivers. A neglected edge is both inefficient and dangerous.

    ### Identifying when sharpening is needed

    – Edges feel rounded or visibly chipped.
    – Tools require more force than usual.
    – Surfaces show tearing instead of clean cuts.

    ### Basic sharpening principles

    – **Maintain original geometry**: Match the existing bevel angle unless you have a reason to change it.
    – **Use appropriate abrasives**: Stones, diamond plates, or files, depending on the tool.
    – **Finish and deburr**: After establishing the edge, remove burrs and polish as needed for durability.

    For striking tools like cold chisels and punches, also inspect the struck end; if it has mushroomed, grind it back to prevent chips from flying off during use.

    ## Step 6: Safe and Organized Storage

    A well‑organized storage system keeps tools protected and easy to find, which indirectly extends their life.

    ### Storage options

    – **Tool chests and cabinets**: Protect from dust and impacts; use drawer liners to prevent sliding and reduce wear.
    – **Wall racks and pegboards**: Keep frequently used tools visible and off damp surfaces.
    – **Foam inserts**: Custom cutouts in drawers or cases prevent tools from banging into each other and show immediately when something is missing.

    ### Environmental considerations

    – Avoid uninsulated exterior walls prone to condensation.
    – Ensure airflow; stagnant, humid conditions speed corrosion.
    – Keep chemicals (like strong acids) sealed and away from tools; fumes alone can accelerate rusting.

    ## Step 7: Establish a Maintenance Routine

    A little structure ensures your maintenance habits stick.

    ### After each use

    – Wipe down tools.
    – Remove debris and moisture.
    – Return them to designated storage.

    ### Monthly (or after intensive projects)

    – Inspect for damage: cracks, loose parts, rust spots.
    – Lubricate moving parts.
    – Touch up protective coatings on metal.

    ### Annually

    – Conduct a full inventory.
    – Deep‑clean storage areas.
    – Sharpen or service tools that have seen heavy use.

    ## Knowing When to Repair vs. Replace

    Some tools can be rejuvenated almost indefinitely; others are best retired once they’re no longer safe or reliable.

    **Repair or service if:**

    – Handles can be safely replaced.
    – Rust is only surface‑deep and not compromising structure.
    – Mechanisms are stiff but not broken.

    **Replace if:**

    – There are deep cracks in handles or tool bodies.
    – Jaws no longer align and cannot be adjusted.
    – Measuring faces or reference edges are permanently damaged.
    – Safety features (like insulation on electrical tools) are compromised.

    Thoughtful maintenance extends tool life, improves safety, and makes every project smoother. A few minutes of care at the end of a job can easily save you hours of frustration—and prevent a favorite hand tool from becoming an avoidable casualty of rust, grime, or neglect.